
In this tutorial I will walk you through some easy steps for creating 3D text in Adobe Illustrator. These steps are pretty simple, but once you learn them, the possibilities for 3D text are pretty much limitless. Ok, let’s get started!
Creating the Document and Setting Up the Text
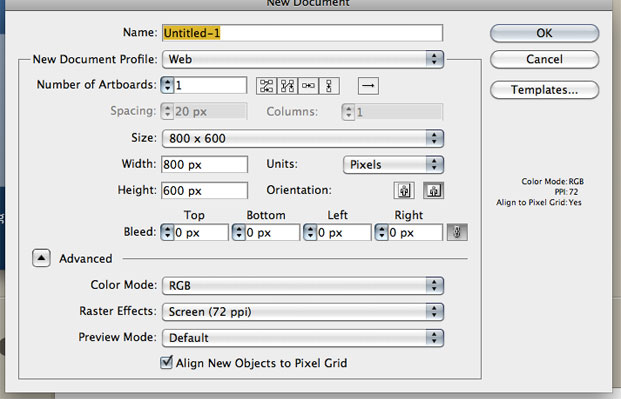
To begin, you will need to create a new document. Go to File > New… and pick your dimensions and resolution. For the purpose of this tutorial I used the the Web default settings.
Next, you will want to create the text you would like to apply the 3d effect to. Using the Type tool located on the toolbar, create a text box, and type your desired text.

While using the type tool you will be able to choose your font family, weight and size. I recommend picking a heavy or bold font.

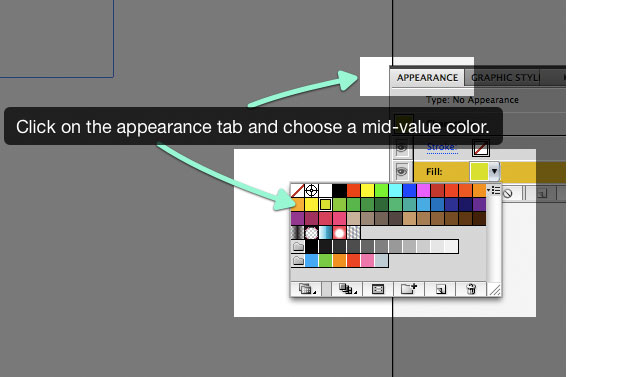
Then, using the Appearance pick your color (Figure 4), preferably a color that is mid-value, meaning neither dark nor light.
Converting Text to Editable Shape
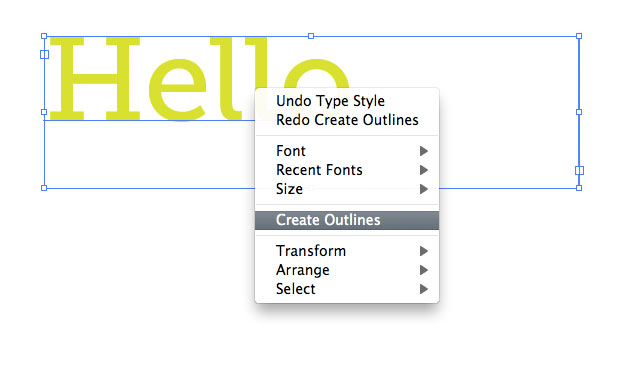
An important step often used with fonts, is creating outlines of the font. This turns a the selected text into an editable shape, handy for doing tricky text manipulations or sharing the document with another person who may not have the same font you chose on their computer. Right-click and select Create Outlines or on the top toolbar go to Type > Create Outlines.
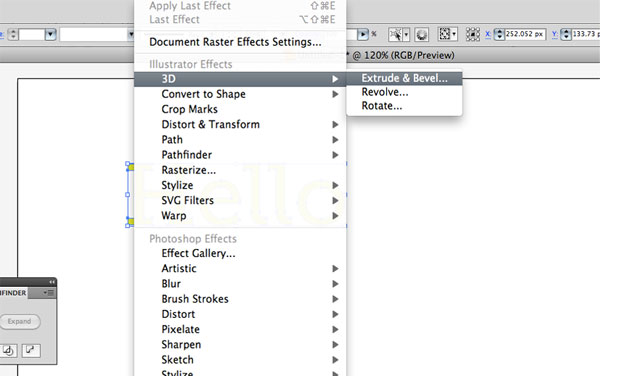
Using Illustrator’s Extrude & Bevel
Beginning with CS4, Illustrator has had the the effect Extrude & Bevel that applies a 3D effect to any vector shape. Once the text has been created into outlines, you can apply the effect onto text. Simply go to Effects > 3D > Extrude & Bevel to apply the effect. I would also click on More Options which allows you to adjust the lighting of the shape.
Get millions of stock images and videos at the best price
Unlimited access. No attribution required. Starts at just $9/month.

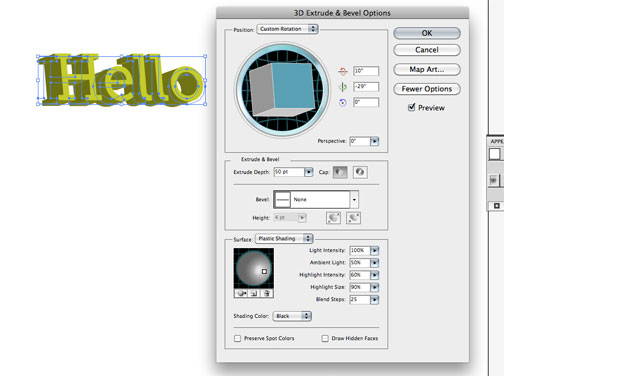
A new window will open up allowing you to customize the effect. I would recommend checking the box Preview that allows you to see your changes as you adjust the values of the different options. For this tutorial, I left them primarilly on default settings. Although I did alter the rotation a bit as wel as the extrude depth.
Rotation: The rotation allows you adjust the angle of the shape based on the x, y and z axis. You can either change the numerical value in the boxes or use your cursor to rotate the cube to get the angle you want.
Perspective: Perspective distorts the shape to create distortion usually visible when you are at looking at an object at extreme angles. For example, if looking at the top of a tall building you’ve probably noticed that the sides of the building do not seem like they are going straight up but rather at a slight diagnol towards the center of the building. By adjusting this value, it will add a certain degree of perspective.
Extrude Depth: This value is the amount of debth or thickness of the shape that you would like to have.
Cap: This option allows you to change from a flat surface for the front of the shape or more of an outline.
Bevel: Beveling is the rounding of edges. Changing to different beveling options will provide different edging and countours to your shape. If you pick a bevel you will be able to adjust the height of it below the beveling options.
Surface: Surface adjusts the texture of 3D shape you will be producing. Plastic Shading gives it a smooth surface and the others have different effects. Try using Wireframe to see outlines of 3D shapes, or No Shading to see what it would look without any lighting.
Lighting Adjustments: After you select a type of surface, and as long as it isn’t wireframe or no shading you will be able to adjust the lighting of your object. You can adjust the intensity or brightness of the light as well as the extent of area that the lighting will hit. You can even add additional lights. Adjust the position of the light by clicking on the white dot on the sphere to the position you would like the light to hit.
And You’re Done!
Once you press OK you will have created your own 3D text which you can manipulate further in Illustrator or then take it into Photoshop. Play around with all the settings of the Extrude & Bevel tool to get a good idea of all the capabilites of the effect.

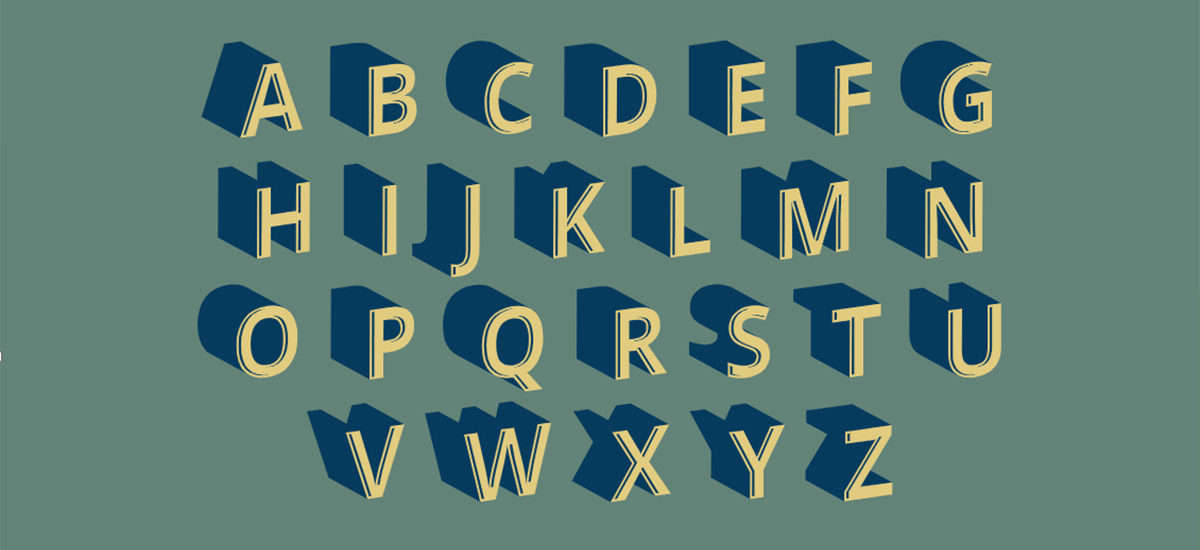
Lead image by Ery Prihananto.